This guide walks you through setting up a communication link between a NEURO and a Davicom CORTEX 320 via RS-232 using a feature referred to as Unit-to-Unit commands (UUC). The example demonstrates sending a temperature alarm from the NEURO to the Davicom CORTEX and controlling a relay based on the alarm state.
Serial Communication Setup
NEURO Setup
- Connect a DB9 serial cable to the serial port located at the back of the NEURO unit.
Davicom CORTEX 320 Setup
1. Connect a USB-to-RS232 adapter to the USB port of the Davicom CORTEX 320.
2. Log in to the Davicom CORTEX 320 web interface.
3. Navigate to Devices > USB Serial.

4. Locate the USB serial converter in the list, right-click it, and select Configure.
5. In the Description tab, name the device if desired.
6. Go to the Action tab:
- Select Serial from the Usage dropdown menu.
- Configure the communication parameters:
- Baud Rate: Set to 9600 (required for communication with NEURO).
- Leave other settings at their default values.
Configuring the Command in the NEURO
1. Log in to the NEURO unit.
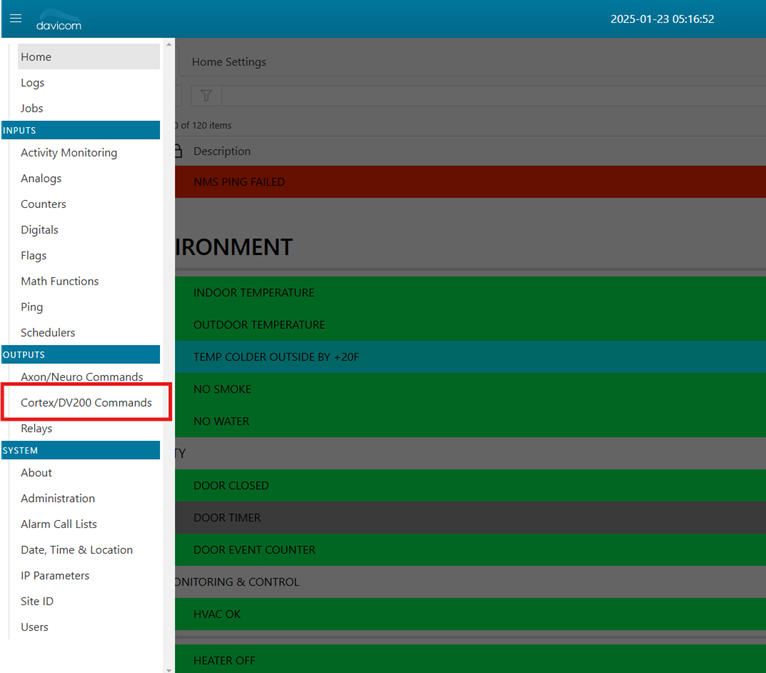
2. Navigate to Menu > CORTEX/DV200 Commands.
3. Select an available command (e.g., 1U1) and:
- Name it with a meaningful description, such as “Temperature Alarm”.
- In the Active and Normal fields, provide relevant descriptions (e.g., “Temperature High” and “Temperature Normal”).
4. Assign a Trigger:
- Click the dropdown menu and select the appropriate input from the NEURO. For example:
- If the temperature sensor is connected to input 5A1, select it.
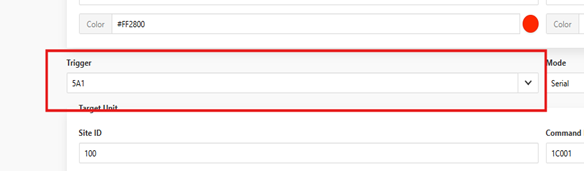
- Set the Communication Mode to Serial.
Assigning the NEURO Command to a Davicom CORTEX Command Flag
1. Determine an available Command Flag on the Davicom CORTEX:
- Log in to the Davicom CORTEX and navigate to Inputs > Command Flags.
- Identify a free command flag (e.g., 1C001).
2. Back in the NEURO:
- Assign the 1U1 command to the identified Davicom CORTEX Command Flag (1C001).
- Adjust retries and delays as needed for communication performance.
- Specify the Site ID of the Davicom CORTEX:
- Log in to the Davicom CORTEX and navigate to System > Site ID to confirm the ID.

- If notification is required for failed communication, select the appropriate Alarm Call List in the NEURO.

Configuring the Command Flag in Davicom CORTEX
1. Log in to the Davicom CORTEX 320.
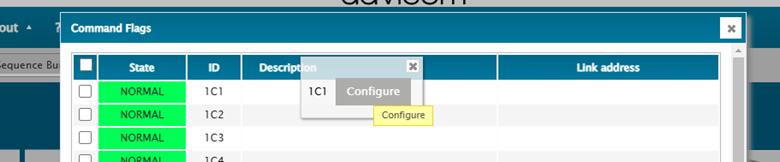
2. Navigate to Inputs > Command Flags and select the configured command flag (e.g., 1C1). Right click. Configure.
3. Configure the command flag:
- In the Active and Normal fields, provide descriptions. Include the NEURO name for clarity (e.g., “NEURO Temp High”).
- In the Action tab:
- Assign an alarm call list for notifications, or select CMD if used for automation/control only.
Assigning the Command Flag to a Relay
1. Navigate to the Controlled Outputs section.
2. Assign the relay ID to be activated by the command flag:
- For Relay 1, enter 1R1 in the first controlled output field.

Testing the Configuration
1. Trigger the temperature alarm on the NEURO (e.g., by exceeding the configured temperature threshold).
2. Verify that:
- The Davicom CORTEX receives the alarm and updates the status of the corresponding command flag.
- The relay on the Davicom CORTEX is activated as configured.
3. Adjust settings (e.g., retries, delays) if communication is not consistent.
Summary
You have successfully set up Unit-to-Unit communication between the NEURO and Davicom CORTEX using RS-232. The NEURO sends a temperature alarm, and the Davicom CORTEX activates a relay in response. This setup can be extended to other scenarios by configuring additional inputs, outputs, or relays.
For further assistance, contact Davicom support.